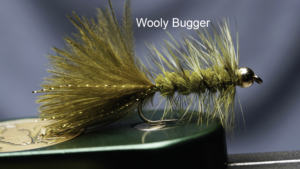
The Wooly Bugger – No trout fly box should be without a handful of Wooly Buggers. Buggers are a versatile streamer that catches a variety of species of fish. While buggers do not exactly imitate specific food items, they mimic leeches, small minnows and large nymphs. They are have great movement in the water and can draw very exciting takes.
Step-by-Step Instructions
Step 1: Prepare the Hook and Bead if you are using a bead. The bead should rest at the hook eye
Secure the hook in the vise and wrap 10 to 12 turns of .015 lead-free wire around the shank to add additional weight. If using a bead, you can push the lead up into the bead to hold the bead in place. A drop of super glue or head cement can further secure the lead and bead…not absolutely necessary however.
Step 2: Attach the Thread
Begin wrapping the olive or brown 6/0 thread behind the bead and over the lead-free wire to secure it in place. You can smooth the transition between the lead and the hook with more wraps…end your tying thread at the start of the bend.
Step 3: Create the Tail
Select a nice Marabou feather. It can help to moisten the marabout to control the feathers prior to tying the tail in. Measure to approximately one hook length, and secure the tail in place.
Step 4: Add the Rib
Cut an 8 to 10-inch length of gold Ultra Wire and tie it in at the base of the tail. This will be used later to rib the fly
Step 5: Form the body. You have two choices here.
Option one is the use chenille. If using chenille, first make a few more wraps on the marabou to form an underbody and trim the marabou. The proceed to wrap the chenille forward forming a body. Stop shy of the bead or the eye of the hook and secure the chenille.
Option two is to use the same marabou used for the tail and make a few turns forward forming a shaggy body….then secure back from the bead or eye leaving a bit of space….secure the marabou and trim.
Step 6: Select a saddle hackle in either a matching or contrasting color. Good color combinations are black/black, olive/olive, olive/ rust. Feel free to experiment. The saddle hackle should be reasonably long and the distance from the stem to the tip of the hackle should be approximately the length of the hook gape. Strip the shaggy wide fluff, tie in the saddle feather from the widest part with the inside or dull side of the feather facing the hook. Proceed to make a couple close turns, then do wider spiral turns back to the base of the tail. Take the wire and counter wrap to secure the hackle. Proceed to spiral the wire forward trying to not trap too many hackle fibers by wiggling the wire between the hackle fibers.
Step 8: Finish the Fly
With wire right behind the bead or behind the eye, make several securing wraps of thread to hold the wire in place. While holding your bobbin firmly, helicopter the wire off or use a wire cutter to trim the wire close. While pinching the front hackle back, take several tight thread wraps to train the hackle back. After forming a nice thread head, proceed to whip finish twice. Trim the thread closely.
Step 9: Final Touches
To add a bit more durability, a couple drops of head cement is a good idea. You can be liberal as it will soak into the thread head. Use your bodkin or a feather and make sure the eye of the hook is clear of any head cement.
Customization
Add some flash on each side of the tail or add some flash first and then the tail has a bit of support. Just a bit of flash can make the fly more effective.
- Hook: Streamer Hook, 3x or 4x long
- Tying thread: 140 denier
- Tail: Marabou
- Rib: Bright copper wire
- Body: Chenille or Marabou
- Hackle: Saddle Hackle to match or contrast with body
- Variations include adding a bead, adding flash to each side of the tail.

